There are many different types of metal buttons, like jeans button, snap button, hook button and rivet. Many people would use sewing hook buttons with holes, and I’ve used many different machines, from basic models to expensive ones. I have a secret for you though. “I still don’t use sew-on buttons, shhh, don’t tell anyone.” You may ask, what do you use instead? Metal snaps.
I love metal snaps fastener, they are my secret weapon. They make any garment look beautiful, although in my opinion, they are much easier to sew than buttons. But there is a learning process to using snaps. In the face of different fabrics, if you install the buttons in the wrong order, you are likely to encounter the dreaded snap that has pushed through the fabric and left a hole that is difficult to repair. So, let’s find out the best snaps for your project and learn some tips for installing them.
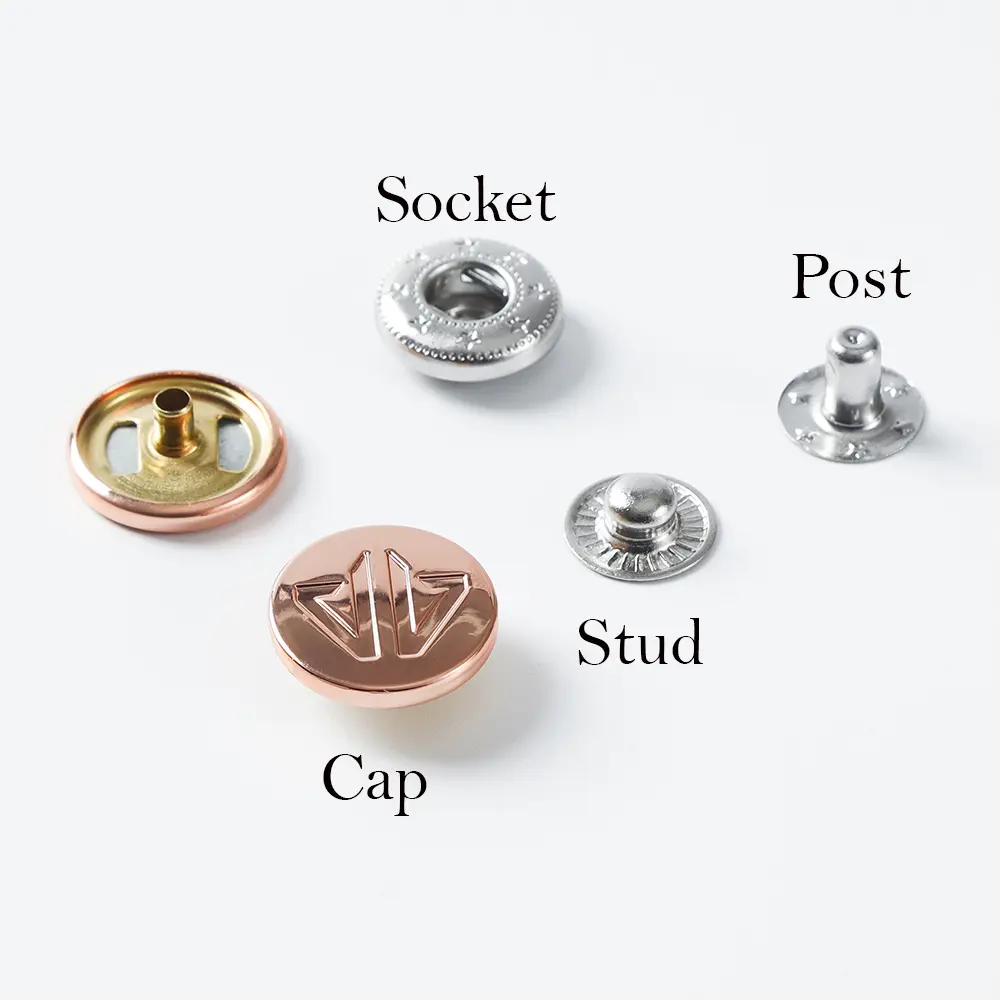
There are four parts to a snap. The “Cap” and the “Socket” fit together and go on the outermost side of the garment. This is the part of the snap that will be seen. The “Stud” and the “Post” will go together in the back side.
Step 1: Use a die mould to poke a hole in the fabric for the button
Step 2: Put the fabric between the cap and socket. The cap goes through the fabric and the socket covers the cap tip.
Step 3: Poke another hole on the other side of the fabric. Place the fabric between the post and button. The post goes through the fabric and the button covers the post on the other side of the fabric. It is very important to tap vertically to connect the post and button.